Each year Cub Scouts has a birthday party for Scouting in February, which is called the Blue & Gold banquet. We have a tradition that at the banquet were we thank all of our volunteers who help make the Cub Scout Pack run. For the Den Leaders, who are so critical to the program, I like to do something special that helps them to run a better program for the scouts. For 2018 (notice I’m a little behind) I decided to make all of the Den Leaders for our Pack knot boards.

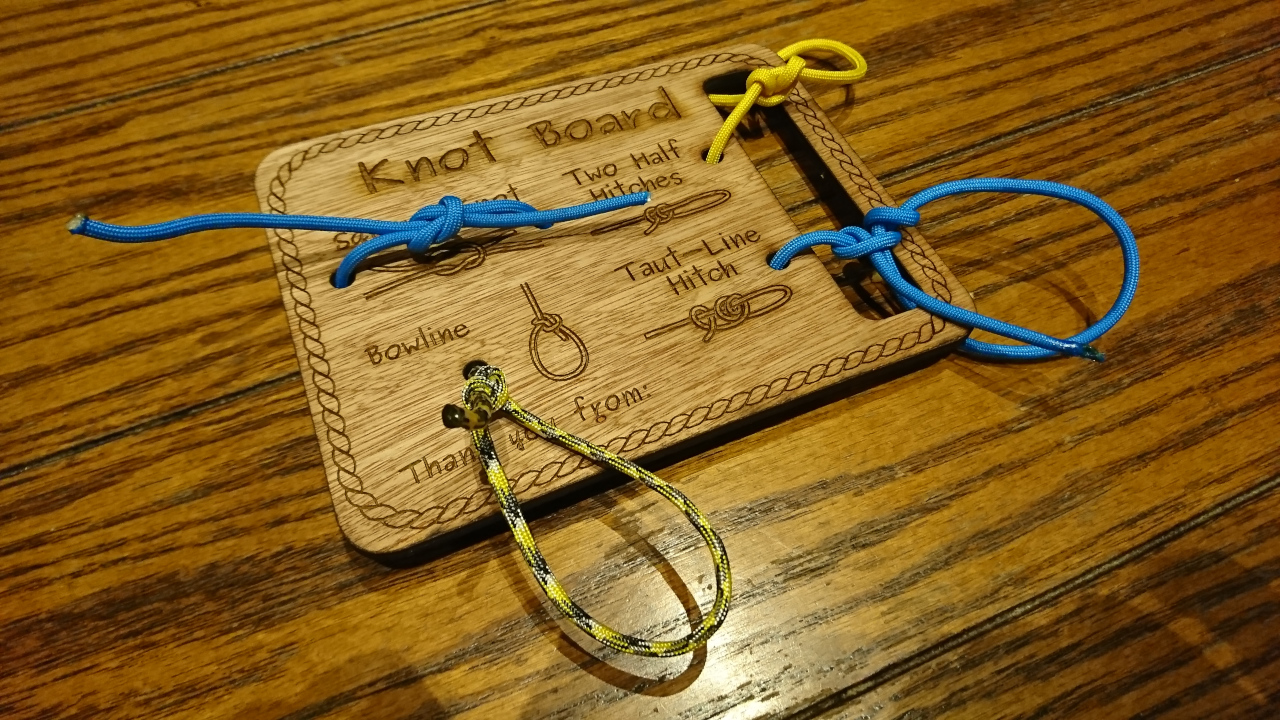
When I was a Scout I remember my mom making knot boards. Back then we had a piece of paper with the various knots that was varnished onto a piece of plywood, which had a rope attached to it. High technology for the time, but today I’m a member of TheLab.ms makerspace and have access to a laser cutter. While these knot boards are the same in spirit, we can do some very cool things with big toys.
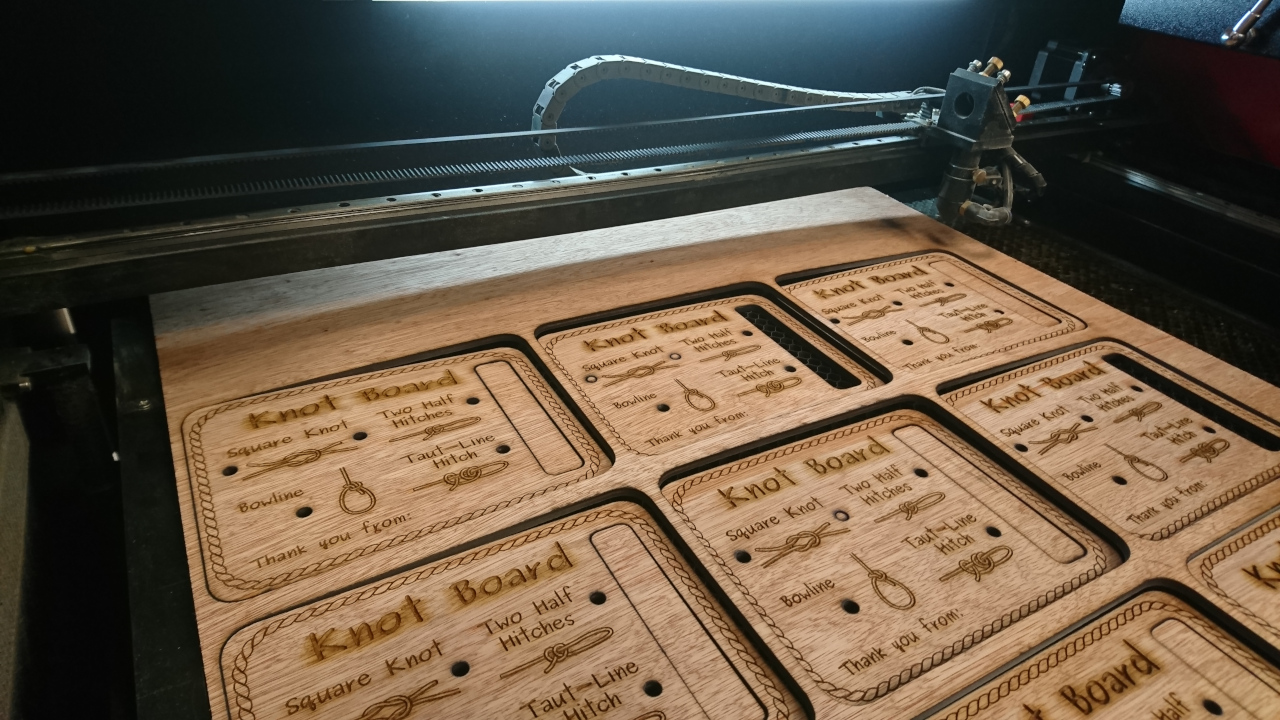
First step is to pull out Inkscape and design the graphics. I grabbed a rope border from Open Clipart and grabbed some knot graphics from a Scouting PDF (which I can’t find a link to). I put those together to create the basic design along with labes for the knots. I also added a place for each Scout to sign their name as a Thank you to the Den Leader. I then make some small circles for the laser cutter to cut out holes for the ropes. I made a long oblong region on the right so the board would have a handle and a post to tie the hitches around. Then lastly I added the outline to cut out the board.
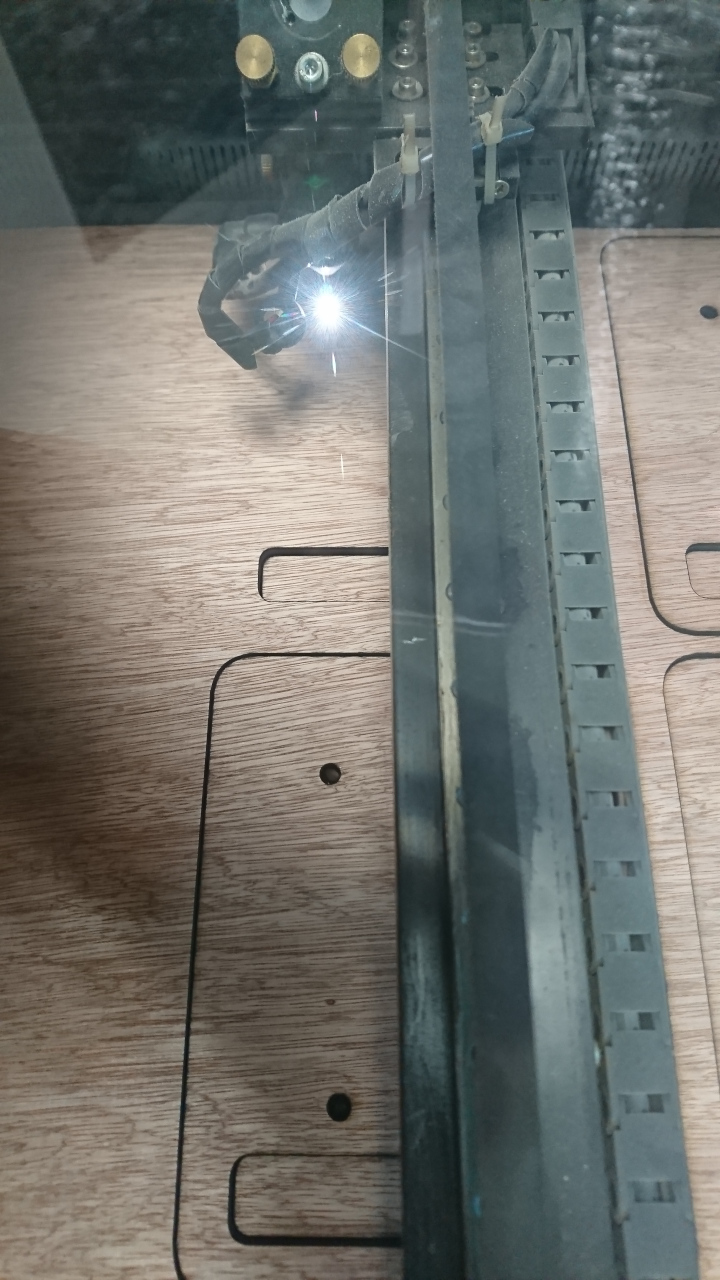
To get the design into the laser cutter I exported it from Inkscape in two graphics. I exported the cut lines as a DXF and I exported the etching as a 300 DPI PNG. The cut lines were simpler and the laser cutter software was able to handle those and create simple controls for the cutter. The knots on the other hand were more complex vector objects and the laser cutter software couldn’t handle them. Inkscape could, so I had it do the rendering to a bitmap. The laser cutter can then setup scans that use the bitmap data which worked very well.
For the boards I used ¼th” Lauan Plywood which I was able to get in 2’x2’ sheets at Lowe’s. Those sheets have a nice grain on both sides. I also liked being able to get sheets that were exactly the size I needed to fit into the laser cutter. Saved me a step. I’m certain the knot boards would be great in many other woods and other materials.
After cutting out the knot boards I needed short lengths of rope to be able to insert into the holes. I couldn’t find anywhere that would sell me short pieces of rope. I felt like I needed a Monty Python sketch. To make short lengths of the paracord I looped it in a circle with the circumference as the length I needed. Then I took a blowtorch and cut the circle. This also sealed the ends of the paracord.
posted Feb 2, 2019 | permanent link